Facebook

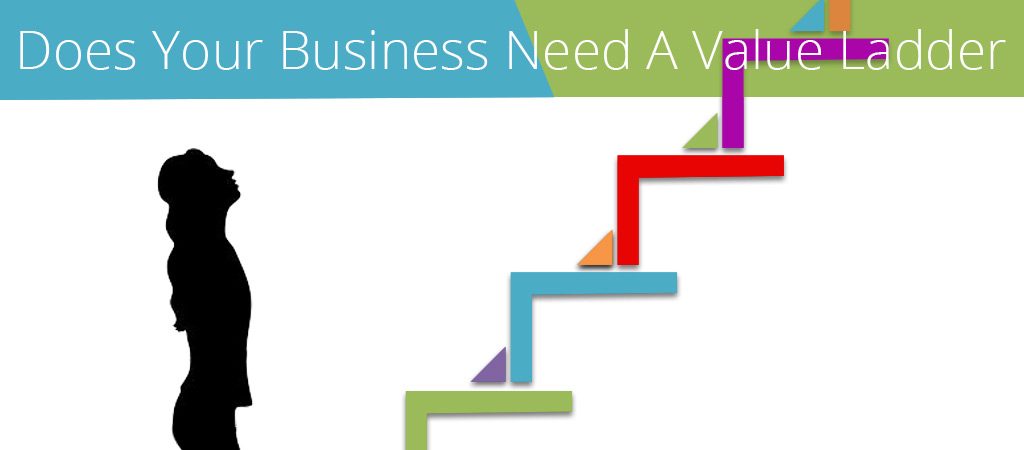
Value Ladder? Why Your Business Needs One

What is the Value Ladder? Some may ask.

Do you know that there is a way to add more value to all your services and products in your business?

How would you feel if you were able to increase your income by 30%, 50% or even 100% almost immediately?

With a very well designed value ladder can give you these types of results to your business very quickly.

Value Ladder?

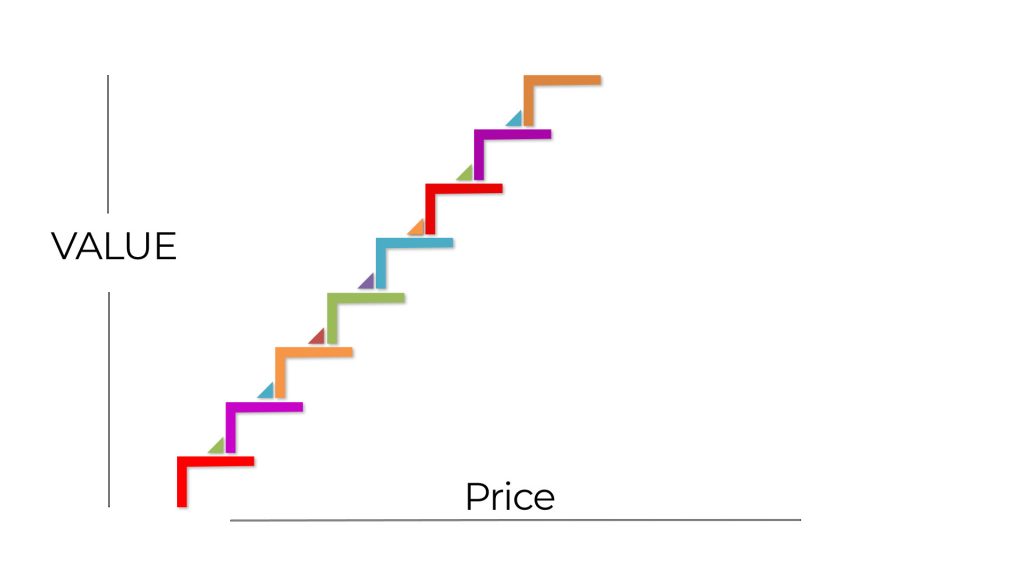
A value ladder is a way of mapping out your product/service offering visually in ascending order of value and price.

Let me explain how a value ladder allows you to cater to your client’s needs, no matter where they are at

How it works is at the bottom of the ladder, you offer a free or very low priced service to your visitor, maybe a free ebook in exchange for their email.

As clients ascend the ladder, the value level increases, as does the cost to play.

The value increases as your clients venture up the ladder.

Value Ladder?

Mapping out your product offering in this way enables you to offer up-sells and down-sells from one product to the next.

Making sure you can provide your clients with the most value, especially ones who are ready to go to the next level of committing to (and will). Will in return you increase your impact and your revenue.

You could not be making as much money as you can in you only have one price or service you can offer. Let me clarify this for you.

Imagine there are three new potential clients and you have a £100 product, which all three would like to have.

One of your new clients has £100. So she purchases. Happy Days!

But to the client two dismay, she only has £50 in her pocket. Without a value ladder, you will lose that sale. If you are able to offer a lower-priced service at the £50 price range she would buy.

While client there has £300 to spend.

With only a £100 service option, you are leaving £200 out of your cash register. This client has £300 worth of value. If you don’t cater to his/her needs, the most you will ever get from this sale will be £100.

As you can see, you need to have a service/product to cater to all possible clients needs. If you do not, as a consequence you are leaving money on the table.

Value Ladder?
Image from conXpros

Are you starting to see how this simple approach can improve your bottom line?

Can you see by taking this simple approach you can improve your bottom line?

Most people focus only on the money/price and not on the value. It is all in the name VALUE ladder and it’s called that for a reason, it is not called a price ladder. You should focus on your client and how your different product offerings deliver value.

Price is secondary. Making more money is a bonus. It happens automatically when you focus entirely on your client and what they actually need.

You should think of the price as secondary, the bonus is making more money. When you focus on your client’s needs it will happen automatically.

Have you thought what your product offering looks like now?

Could you map it out based on the level of value? Can you see gaps where you can enhance your offering?

Is there a way you can map out a base level offer you a place at the first level of the ladder?

Can you see any areas where you can enhance your offering? Are there any gaps?

Let me give you an example of a value ladder for a salon, hopefully, it will give you some inspiration. The goal is to deliver your clients more value.

Iwona is a Salon owner, she trains members of the public to learn new PMU techniques. Her value ladder in ascending order might look a little something like this:

Value Ladder?

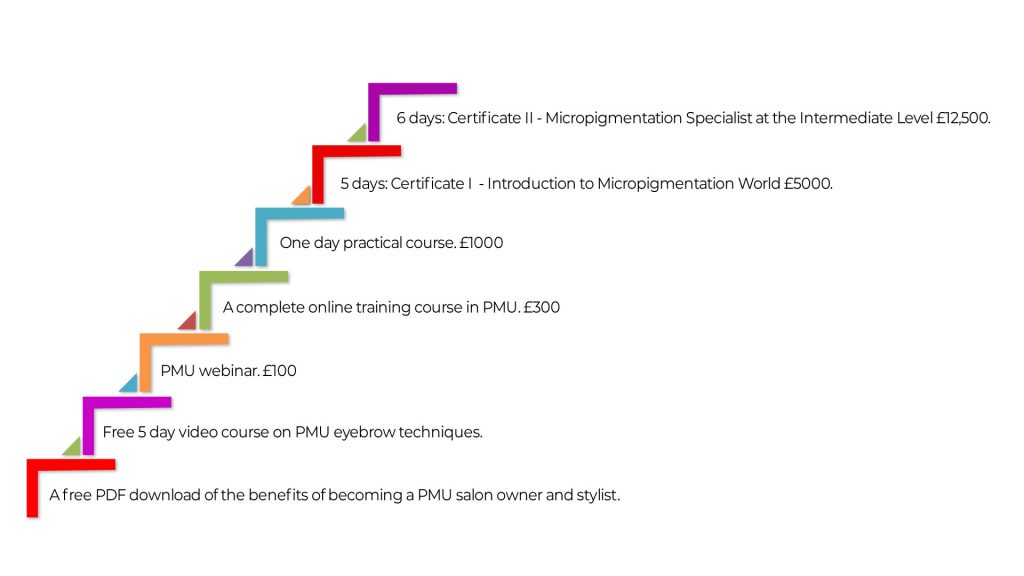
There are many ways you can build out your value ladder. You just need to focus first on your ideal client. What do they want and need from your product/service?

If you want to give your business to grow, this is one of the best practices to can do to make it happen.

Re-Target Your Website Visitors

It may seem like it, but not all Facebook Audiences are Equal

Lookalikes and cold Audiences may be the largest in size, but they are not by far the biggest opportunity. It’s your re-targeted hot website visitors (your website custom audiences) who will deliver your highest return on ad spend.

If you are not letting Facebook ads know about your website visitors and using website custom audiences. You are literally leaving money on the table (not making as much money your business could be making)

I would like to share with you in this article, how to build a website custom audience (WCA) on Facebook. I will also show you my step by step guide to creating a full Facebook Ad Campaign that targets your audience.

1. Create a website custom audience for the last 180 days

Website custom audiences group people based on them being pixeled when they visit your website. You then set conditions, such as what pages someone needs to visit or conversion actions they need to be taken, also in what timeframe, to be included in your audience.

When you want to create any king of website custom audience, you have to first have a Facebook pixel on any conversion tracking installed on your website. (If you would like to know how to go about doing that, here is this step-by-step-guide by Facebook.)

To start things off you will need to get the WCA which groups all your website visitors in the last 180 days.

Now, let’s start this audience, you will need to go to your audiences dashboard using Facebook Ads Manager on the main menu.

Click on Create Audience once loaded and from the dropdown.

You can see below, you will be offered a list of different custom audiences like Customer List (this if you want to use your own database) offline activity, App activity and what you will be using Website traffic.

Click on website Traffic and you will be presented with the following pop up (see below). Give your pixel a name and add your website URL and click on Create.

It will open on Create a website custom audience creation window. At the top, make sure that the “include” condition is set to ANY and not ALL.

Select your Facebook pixel you created earlier. If it’s all working correctly, you should see a green dot next to your pixel name showing it’s active.

Leave the website conditions as Default (All website visitors) and in the day duration field, we are going to change it to 180 days. This is the maximum that Facebook will allow for the number of days for website custom audiences. I would say this is the best starting point testing your website custom audiences. This will create the largest of audiences, especially if you have a small number of visitors a month.

Finally, name your website custom audience: I chose “My 180 days of Website visitors”  I think it was appropriate😉

Create a specific name for your custom audience condition will help you easily keep track and identify your audience, especially when you start new website custom audiences and other audiences.

It will take about an hour or so to populate website custom audiences but can take longer if you have a large number of website visitors per month.

2. Create a website re-targeting campaign to target your new audience

Creating your custom audience was only the start of it, now it’s time for the exciting part. We are going to build a campaign using our freshly created “My 180 days of Website visitors” audience.

What we have to do now is to choose an objective. Traffic Objective is a good place to start, has it’s perfectly optimised for views on a landing page.

When you click Create campaign and click on the switch To Quick Creation button on the top right.

When you click the switch To Quick Creation button in the quick creation window and name your new campaign. I would recommend setting your buying type to Auction

Name your ad set and click on Save to Draft. When your campaign opens, you will need to navigate to the Ad Set level by selecting “1 ad set” at the top of the window.

website visitors facebook ads

You will need to select Website as the destination to drive people to from your ads now you are at the ad set level, in the Traffic section.

Now you will have to set your daily budget in the Budget and schedule section. As a rule of thumb for every 10K people in your Website Custom Audience, set a £5 per day budget. For example, if you have 50K people in your website custom audience, your daily budget would be £25.

When In the audience section, from the Custom Audience field, search for and select the “My 180 days of Website visitors” you created earlier.

Set your target country in the location field as you are using your website custom audience you can leave the rest of your audience sections such as age, gender, and detailed targeting as Default.

In the Edit placements, I would recommend that you deselect all placements apart from Facebook feeds and Instagram feeds in the Placement section.

Finally, in the Delivery and Optimization section, select Landing Page Views from the drop-down, and make sure the Set a Bid Cap is not selected.

website visitors facebook ads optimisation

Now we move on to the Ad Level of your campaign. This is where we are going to create the ad to put in front of your website custom audience.

You will want to use the testimonial ad type in the RTM Method (Reminders, Testimonials, Messenger), when targeting a hot audience of website traffic.

website visitors facebook ads RTM

You will want to build social proofing to establish a greater level of trust and confidence with your audience. The best way to do that is by using Testimonial ads. It will make you your audience want to re-visit your website and convert into a new customer or client.

At the Ad Level, select your Facebook page and Instagram account from the Identity section.

Under the Create Ad tab, select an ad with an image or video. This is known as the single image or video format. We are going to start this campaign with a single image ad.

Click Select Image and then from the Image Library choose a relevant image to the offer you want to promote. For example, you could run a promotion on your most popular product and therefore choose a product image.

TIP: The the best ad format for a single image ad is now 1:1 square ratio, like on Instagram. Minimum of 1,080 x 1,080 pixels.

Next, in the text section follow this copy structure.

  1. Start your ad with a client testimonial or customer.
  2. State your offer to hook your audience to come back to your website. This could include a price incentive such as a discount for first-time customers or clients.
  3. Add any additional social proof, such as “join thousands of happy customers” or “5 stars rated on [insert review platform].”
  4. Add a Call to Action (CTA) such as “click the link below” to “shop now.”

In the website URL section, link back to the most relevant page based on the offer in the ad copy. Also, reiterate your offer in the Headline field. In the Newsfeed link description field, either reiterate the discount code they have to use or your CTA.

Finally, set your CTA button. eg. When buying a product use “Shop Now” and for lead-based businesses use “Learn More,” “Book Now,” or “Contact Us”. This is depending on the offer you used in your ad copy.

Ensure that your Facebook pixel is enabled in the tracking section, click on Publish to set your new campaign live.